DIY Sake Brewing: The Art of Crafting Japanese Rice Wine at Home
Share
Sake, also known as Japanese rice wine, has been enjoyed for centuries in Japan and has grown in popularity around the world. With its complex flavors and smooth finish, this traditional beverage is now finding a new audience among DIY enthusiasts. Brewing sake at home can be a rewarding experience, allowing you to experiment with different flavors and techniques. This article will provide an overview of the sake brewing process and offer tips for those who want to embark on this fascinating journey.
- Understanding Sake
Sake is made from rice, water, yeast, and a mold called koji. The rice is polished to remove the outer layer, leaving behind the starchy core that is essential for sake production. The process of brewing sake shares similarities with brewing beer, as it involves fermenting sugar into alcohol. However, unlike beer, sake fermentation occurs in two stages: first, the koji breaks down the starch in the rice into sugar, and then the yeast ferments the sugar into alcohol.
- Choosing the Right Ingredients
The key to brewing high-quality sake lies in selecting the right ingredients. Here are some considerations for each component:
- Rice: Choose a sake-specific rice variety, such as Yamada Nishiki, Gohyakumangoku, or Koshihikari. These types of rice have a higher starch content, which is ideal for sake brewing.
- Water: Opt for soft water with low mineral content, as it will produce a more refined flavor.
- Koji: Purchase koji spores or pre-made koji rice from a reputable supplier. Koji is essential for converting rice starch into sugar.
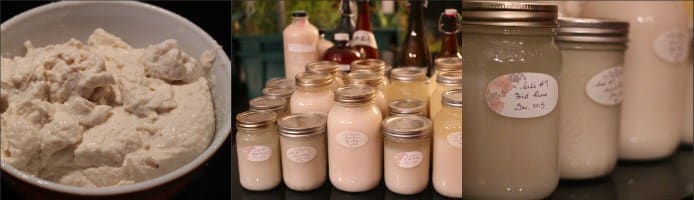
- Yeast: Select sake-specific yeast strains, such as the popular No. 7 or No. 9, which are known for their clean, fruity flavors.
- The Sake Brewing Process
The basic steps for brewing sake at home are as follows:
- Preparing the rice: Wash the rice thoroughly until the water runs clear, then soak it for a specified period, depending on the rice variety. After soaking, steam the rice until it's cooked but still firm.
- Koji making: Inoculate a portion of the steamed rice with koji spores or mix it with pre-made koji rice. Incubate the koji rice in a warm, humid environment for 36-48 hours, allowing the koji mold to propagate.
- Yeast starter (moto): Combine the koji rice, steamed rice, water, and yeast in a sanitized container. Allow the mixture to ferment for 7-14 days, forming a yeast starter called moto.
- Main mash (moromi): Add more steamed rice, koji rice, and water to the moto to create the main mash, known as moromi. Stir the mixture daily for the first few days, then allow it to ferment for 18-30 days, depending on the desired final product.
- Pressing and filtering: Once the fermentation is complete, press and filter the moromi to separate the liquid sake from the rice solids (kasu). Use a cloth bag or a specialized sake press for this step.
- Pasteurization and aging: Pasteurize the filtered sake by heating it to 140-150°F (60-65°C) for a few minutes, then cool it rapidly. Age the sake for a minimum of one month to develop its flavors, though some varieties benefit from longer aging periods.
- Experimentation and Personalization
One of the joys of home brewing is the opportunity to experiment with different techniques and ingredients. You can modify the rice polishing ratio, fermentation temperature, or aging period to create unique sake styles. Additionally, you can infuse your sake with fruits, herbs, or spices